ThemeSync Walkthrough: From Connecting a Store to Client Sign-off
One Shopify project from start to finish: credentials, a dev theme or the imported live theme, template mapping, a QA scan, a review link, comments, sign-off and the deploy.
What you need before you start
This walkthrough follows one Shopify project through ThemeSync. The example store is bare-press-bev, a beverage brand, and the job is a homepage and product page redesign. Every screenshot below is from the app.
You need three things:
- A Theme Access password for the store. The merchant installs Shopify's Theme Access app, enters your email, and Shopify emails you a credential that starts with
shptka_. - An Admin API token (optional, but you'll want it). The merchant creates a custom app with read scopes such as
read_productsandread_content. The token starts withshpat_. - A git repository for the theme (optional). GitHub works; you can also start without one.
If you're unsure which credential does what, Theme Access password vs Admin API token covers the difference and includes a message you can send to the merchant.
Step 1: connect the store
Add the store with its .myshopify.com handle and paste the Theme Access password. ThemeSync stores credentials per store, encrypted, so every theme you create on that store reuses them.
The Theme Access password is what lets ThemeSync run the Shopify CLI against the store: shopify theme dev, pull, push and theme check. It only covers themes. It can't read orders or customers.
The Admin API token is what makes the later steps use real content. Without it, ThemeSync falls back to the store's sitemap to find URLs. With it, template mapping can list products in a collection or articles in a blog through the Admin REST API, and the QA page picker shows real pages grouped by type.
Step 2: a new dev theme, or import the live theme
There are two ways to start, and most projects use both.
New dev theme. This is where the redesign happens. Give it a label, leave Theme ID blank for a fresh development theme, and optionally point it at a git repository. The store's Theme Access password carries over automatically.
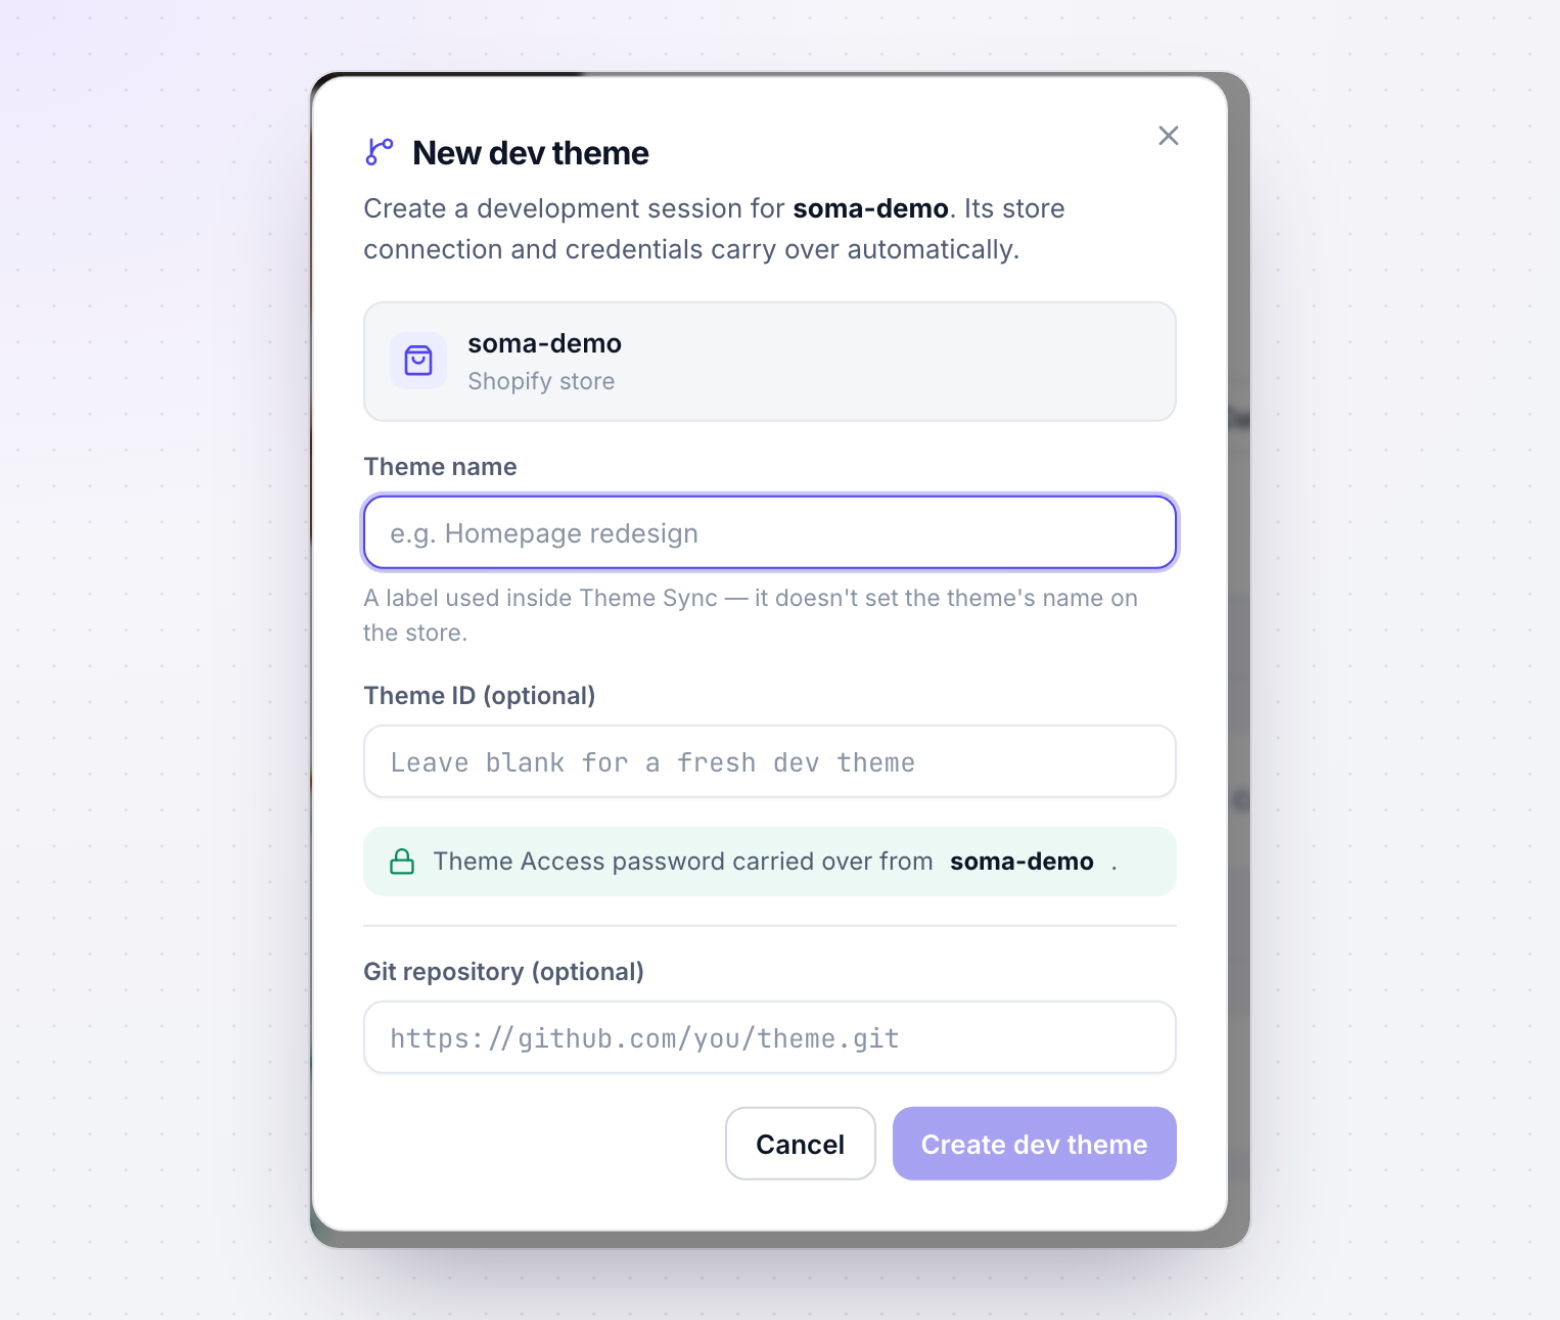
ThemeSync runs shopify theme dev --theme-editor-sync in the cloud, so the theme doesn't stop when your laptop sleeps. It also writes assets/theme-keepalive.css every 23 hours. Shopify deletes development themes after about seven idle days, and the keep-alive write stops that from happening mid-review. The background is in why Shopify dev themes disappear.
Import the live theme. Under Live Theme Tracking, import the published theme. ThemeSync pulls it on a schedule (every 5 minutes by default; 1, 2 and 15 minutes or manual are also options) and commits each change as [shopify-sync] YYYY-MM-DD HH:MM with the changed files. Every theme editor change the merchant makes during your project becomes a commit you can read.
If the store's live theme isn't tracked yet, ThemeSync shows an "Untracked live theme" banner with a one-click Import. Do it on day one. When you deploy at the end, you'll know exactly what the merchant changed in the meantime.
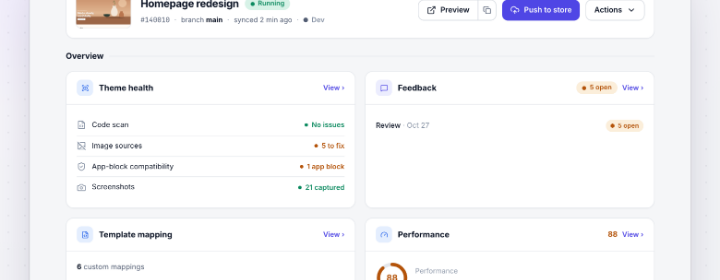
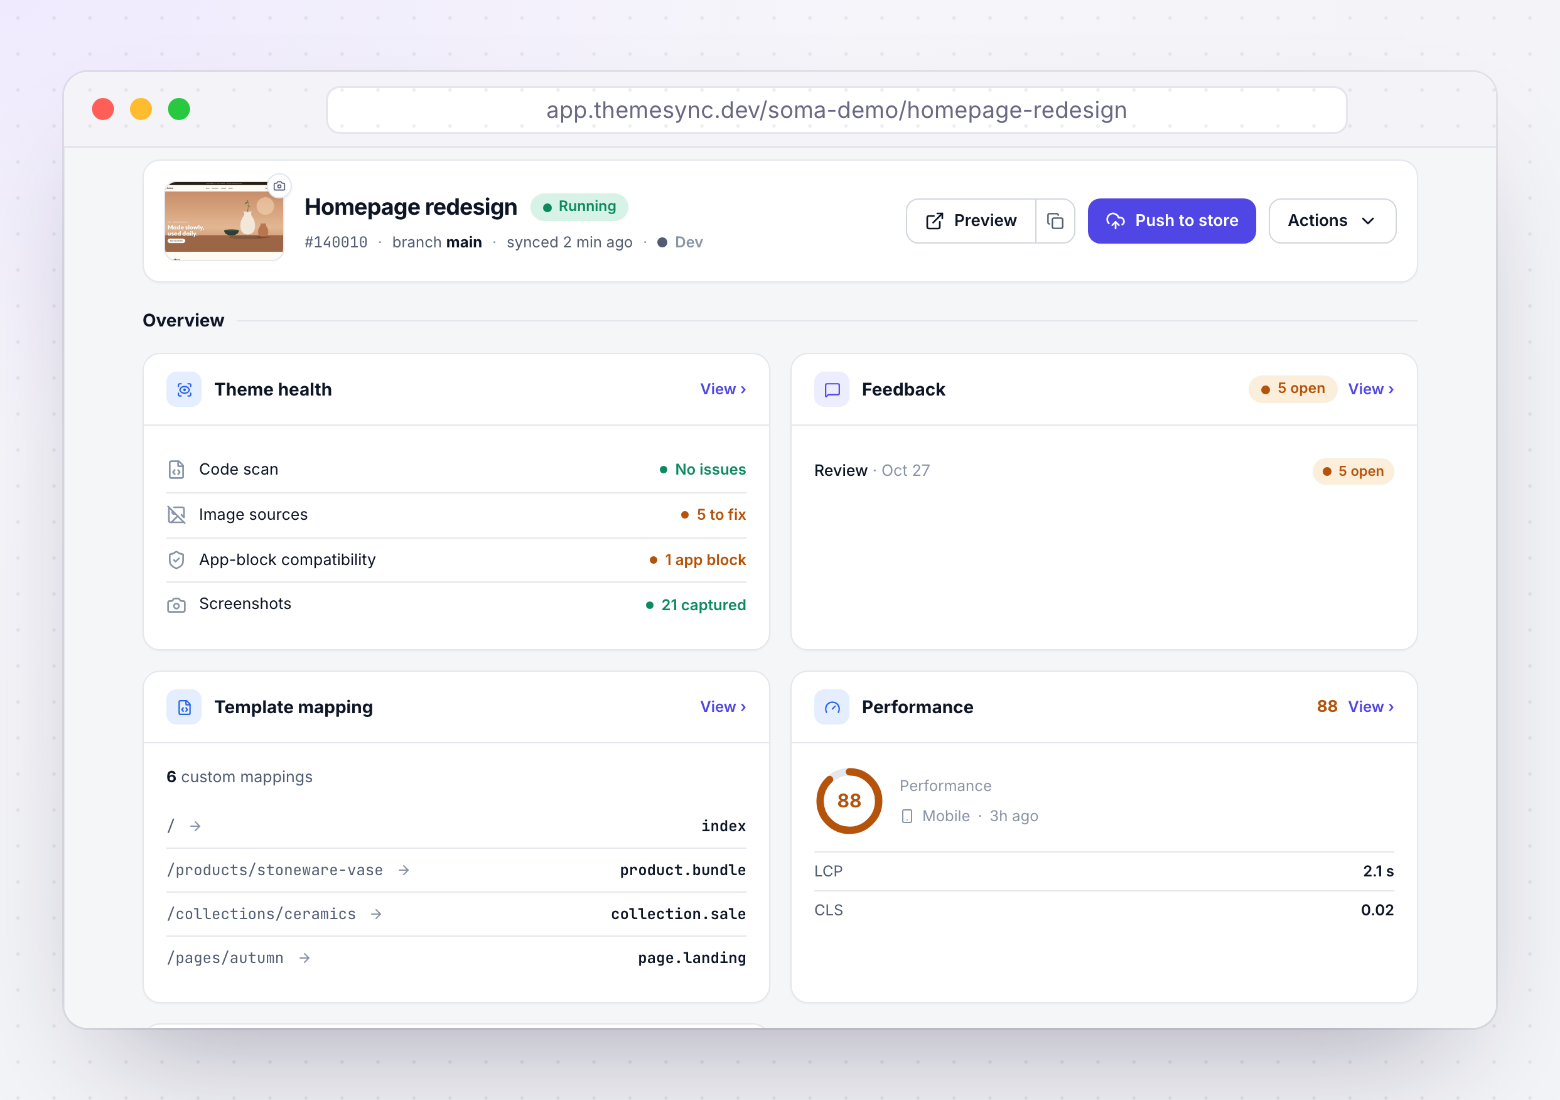
The theme overview
Each theme has an overview page. It's the place to check status before you send anything to a client.
- Theme health lists the code scan, image sources, app-block compatibility and screenshot status.
- Feedback shows whether a review session is open.
- Template mapping counts custom URL-to-template mappings.
- Git source shows the branch, uncommitted changes, and how far ahead or behind the remote you are, with Pull and Commit buttons.
The console at the bottom is the live output of the CLI process. If a push fails or a preview won't start, the reason is there.
Step 3: map templates to real URLs
A redesign usually adds alternate templates: page.our-story.json, product.bundle.json, blog.recipes.json. On a development theme, those templates aren't assigned to anything yet, because assignment is data on the store, not code in the theme. A client opening /pages/our-story sees the default page template.
Template Mapping fixes that for preview. You map a store URL to a template, and ThemeSync adds the matching ?view= parameter when anyone opens that URL through the preview. Conditional rules cover groups: every product in a collection, every article in a blog.
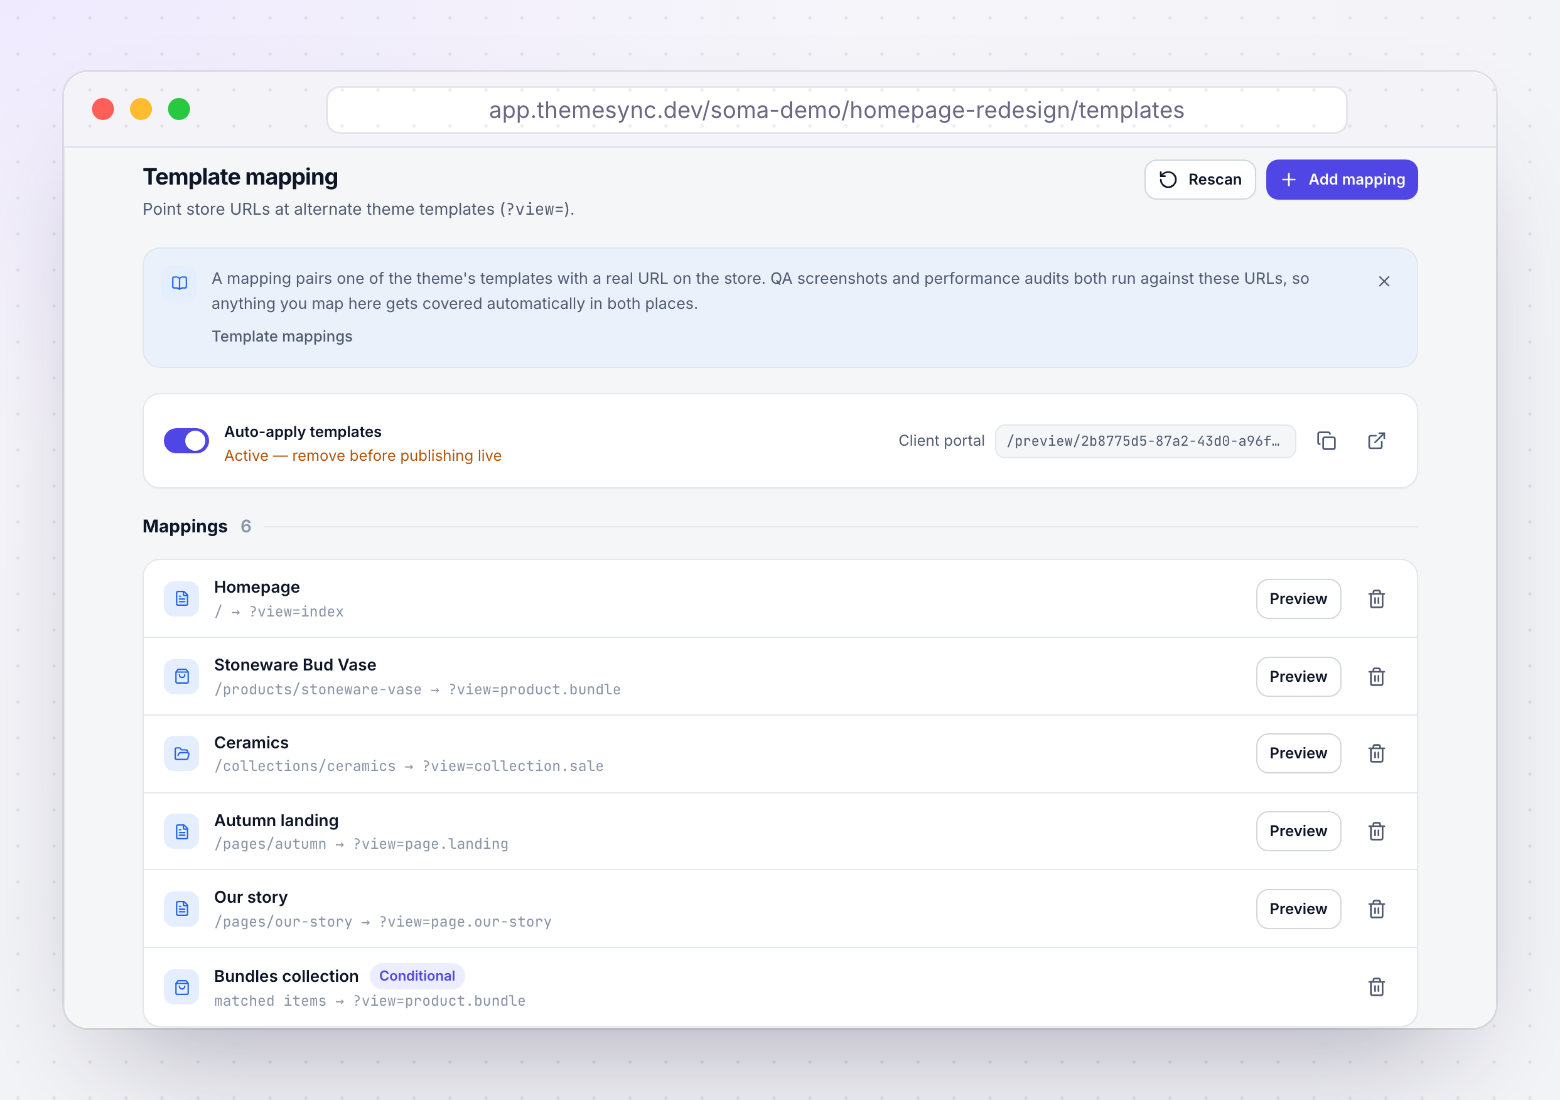
Mappings appear in the client portal too, so the client sees the right template without typing parameters. The mapping badge reads "Active — remove before publishing live" as a reminder that real template assignment still has to happen on the store at launch. The template mapping guide goes deeper.
Step 4: run a QA scan
Before a client sees anything, capture the pages yourself. Open QA & Screenshots and start a new scan.
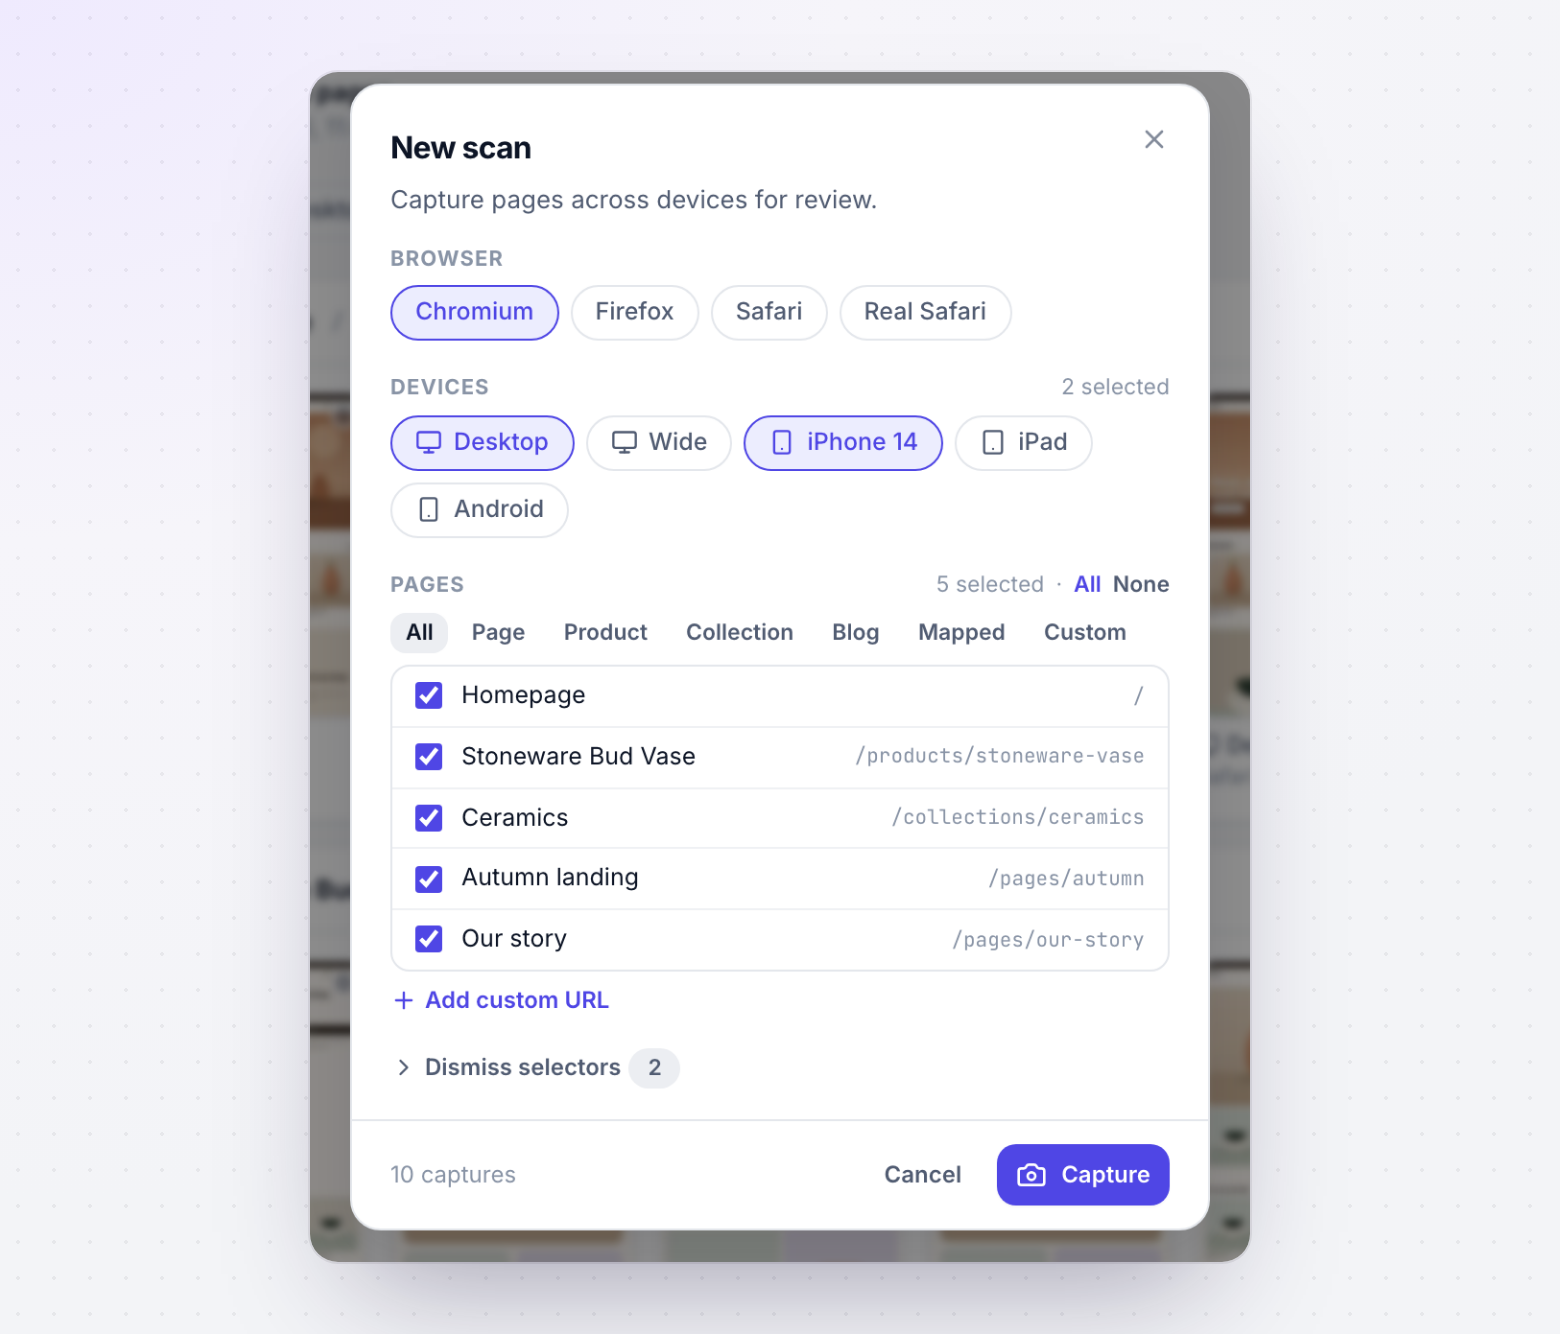
Browsers are Chromium, Firefox, Safari (WebKit) and Real Safari, which runs on a real iPhone. Devices are Desktop 1280×800, Wide 1920×1080, iPhone 14 390×844, iPad 768×1024 and Android 412×915. Pages can be filtered by type, including Mapped for the URLs from step 3, and you can add custom URLs.
Captures are full-page. ThemeSync scrolls to load lazy content and dismisses popups and cookie banners using the selectors under Dismiss selectors. Then review each page and device: approve it, or reject it with a reason. A later scan clears approvals for the pages it re-captures, so a fix always gets looked at again.
On Pro and Agency, run the code scan at the same time. It flags patterns like backdrop-filter without a -webkit- prefix that tend to show up as Safari bugs in the screenshots. The mobile Safari checklist lists what to look for.
Step 5 and 6: review link and comments
From the theme's Feedback tab, create a review link for this round. Set an expiry between 24 hours and 30 days, or never. The client doesn't need an account.
The link opens the development theme preview with a toolbar at the bottom. In Browse mode the client uses the store normally. In Comment mode they click to pin a comment or drag to select an area. Each comment records the browser, device and viewport automatically, so you don't have to ask "which phone?".
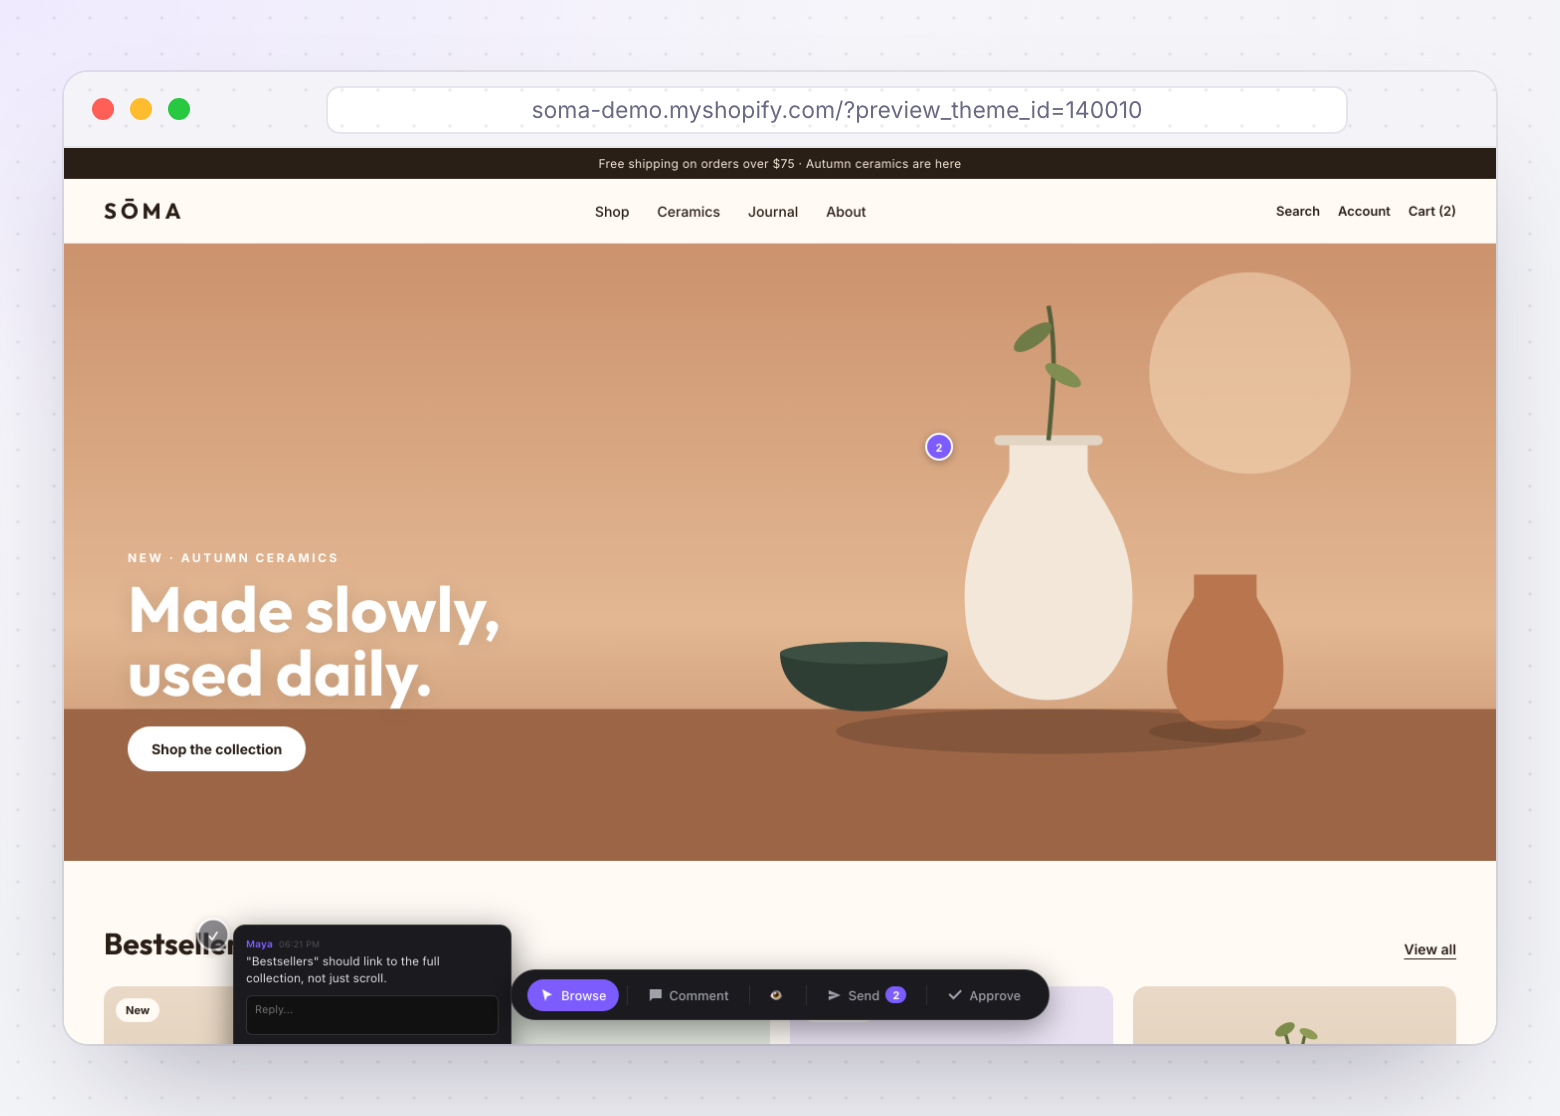
You reply in the same thread. Comments are grouped by page in ThemeSync, can be exported as JSON, and come with annotated screenshots. A page can't be approved while it still has open comments, which stops "approved, but fix the headline" from slipping through.
Pro includes one open review link per theme. Agency has unlimited links, which matters when several stakeholders review in parallel.
Step 7: sign-off
- Designerper page + viewport
Layout, type and spacing match the design on each viewport.
- QAper page + viewport
Screenshots across browsers are approved; no open rejections.
- PMper page + viewport
Scope is done and the client’s comments are resolved.
- Clientvia review link
Approves each page for their own device from the review overlay.
On the Agency plan, sign-off is tracked per page and per viewport for the Designer, QA and PM roles, plus the client through the overlay. Each approval, rejection or revocation is recorded with the person's name and the time. When the client asks in March who approved the mobile product page, you can answer.
Pro users get the client's per-page approvals from the overlay and QA approvals from screenshot review, without the team roles. Per page, viewport and role sign-off explains why the granularity matters.
Step 8: deploy
Once everything is signed off, there are two ways to ship.
- Deploy to Shopify on the tracked theme. ThemeSync shows the pending commits before it pushes, so you see exactly which files change.
- Push to store from the dev theme overview, when you want the dev theme's files on a specific theme.
Before either, pull the live theme. If the merchant edited the theme editor during your project, those changes are already commits from Live Theme Tracking. Merge them into your branch so your deploy doesn't overwrite them. Pushing to a live theme safely has the full checklist.
Then do the launch-only tasks: assign the alternate templates on the store, remove the preview mappings, and run a performance audit on the live URL to compare with the preview. Publish, rename and duplicate are available from the tracked theme if you'd rather publish a duplicate than push over the live one.
How ThemeSync fits around your existing tools
Nothing in this flow replaces your editor, git host or Shopify CLI habits. ThemeSync runs the same CLI commands you'd run locally (theme dev, pull, push, theme check) on a server that stays up, and adds the parts that are hard to do from a laptop: a preview that doesn't expire, screenshots on browsers you don't own, and a record of who approved what.
The Free plan covers one store and two themes with Chromium screenshots on Desktop and iPhone, which is enough to try steps 1 to 4. Review links and the code scan need Pro; team sign-off needs Agency. Every paid plan starts with a 14-day trial without a card.
Takeaways
- Ask for a Theme Access password and a read-only Admin API token on day one.
- Build on a development theme ThemeSync keeps alive, and import the live theme so merchant edits are tracked in git.
- Map alternate templates to real URLs before anyone reviews them.
- Run your own QA scan before the client sees the preview.
- Send a review link per round. Comments carry device and viewport automatically.
- Record sign-off per page and viewport, then pull the live theme before you deploy.
Run your next Shopify project this way
Connect a store, start a dev theme that stays alive, and send the client a review link without touching their theme library.
Try ThemeSync Free →